Mini Piping Foot
$ 23.94
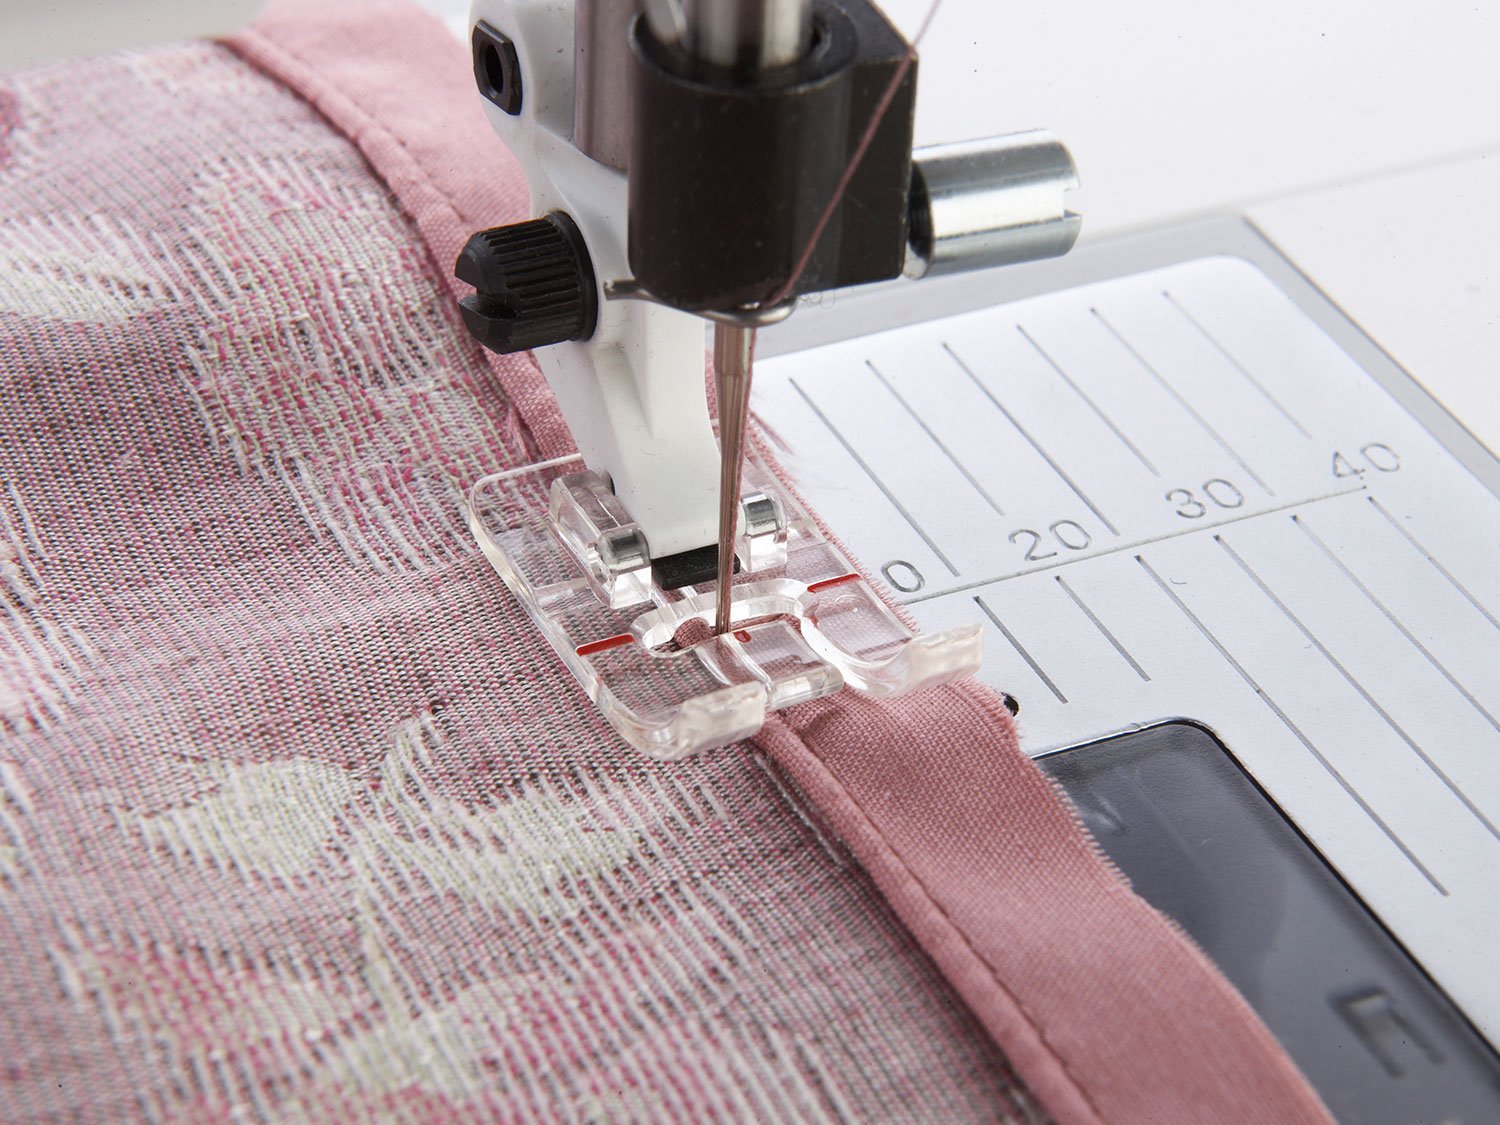
DescriptionInsert package piping into seams and edges for a tailored finish. Cover cord with fabric for speciality piping. The clear view allows you to see the piping placement and see exactly where you are stitching and enables you to see the first row of stitching and adjust your needle position to stitch next to the original row. Straight stitch, length 2.5. To make piping from your fabric: Snap-on the Mini Piping Foot Cut bias or crosswise grain strips wide enough to cover the cording plus seam allowances. Lay the cording on the wrong side of the fabric strip and wrap the fabric over the cord. Place the fabric and the cord under the Mini Piping Foot with the cord in the groove on the underside of the foot. Sew. The groove will guide the cord so the fabric covers it evenly. Hint: When you sew this piping into a garment or other project, adjust the needle position so it stitches one position closer to the cord, to cover the first stitching. To stitch piping into a seam: Snap-on the Mini Piping Foot Place the piping along the seam line of the right side of the fabric and stitch in place with the piping in the groove of the foot. Place the second piece of fabric on top with the right sides together. Put fabric and piping layers under the Mini Piping Foot with the piping in the groove on the underside of the foot. Sew. The groove on the underside of the foot will guide the piping as you sew. Hint: Notch the seam allowance of the piping on curves and corners